Are you looking for tips on how to supply artwork for print? Setting up your file correctly is the very first step towards getting a great print result, and can prevent costly mistakes later during the print process!
Read on, for a few hot tips for how to supply artwork for print.
HOW TO SUPPLY ARTWORK FOR PRINT
There is a huge benefit to hiring a professional graphic designer, and if you have the funds you will get amazing results! However, if you are not a graphic design professional, and your budget won’t allow you to hire one, you don’t have to miss out. Maybe you are a little bit creative but don’t have the formal training! This stuff can be complicated and there is plenty of confusing terminology. However, it’s important to set up your artwork for print correctly. We are here to help.
Programs for supplying artwork for print
Setting up artwork for print starts with creating the file. The main thing here is that PDF is the preferred file format. What program you use to get there will depend on your skill level.
Adobe really dominates the graphic design world, at least for now, so InDesign and Illustrator, and even Photoshop are by far the most common programs used for print. At the moment they are subscription based. It’s recommended that you export any file as a PDF.
Files must be set up in CMYK, a minimum of 300dpi resolution, and exported with at least 3mm of bleed and trim marks.
Illustrator
Illustrator is usually for designing logos, icons, and other vector files, and can also work for single pages such as business cards or flyers. For print, you can export your file as a pdf, eps, or ai file. Ai is an Adobe Illustrator specific file, so as the name suggests, it can only be opened in Adobe Illustrator. Embed fonts or outline them if no changes will be required. What does this mean? Embedding the font exports it with the file. Outlining the font converts it into a series of vector shapes. What does THAT mean? It means it’s no longer text, it’s made up of lines and points. We recommend outlining your font if we won’t need to make changes.
InDesign
InDesign is much better for things like booklets or any multiple page items. You can export your entire project as a pdf, or as an indd package – this will create a zip folder that includes all the images and fonts used in your project. Indd files can of course only be opened in Adobe InDesign.
Photoshop
Photoshop is great for working with images, but we do not recommend it for text. On exporting your file everything will be flattened, and that includes your fonts and icons (such as logos). This can result in text having a slight blurriness.
Microsoft Programs
Microsoft Word, Publisher, PowerPoint: Yes, yes, no. Controversial opinion maybe, but Word can actually work for print, particularly for documents that are mainly text and do not require bleed. However, consider that if you use a special font, and send it to someone who doesn’t have that font, it will default to something else. That will change your layout.
Standard fonts are the big names like Times New Roman, Arial, Calibri, and old mate Comic Sans. Despite being very famous, Helvetica does NOT come with Microsoft Office.
The best way to get your Word document printed the way it looks on your screen, is to export it to a PDF. The other thing is that while it is possible, it’s not easy to make a bleed area. Word is best suited for books – think family history, or memoirs – that are mostly text with no background colours and no images that bleed (go right to the edge of the page).
Publisher is okay – for single page files that do not require any bleed.
PowerPoint is not for print at all. PowerPoint files make your printer sad.
Canva
Canva is a new player in the game that has become hugely popular recently. This is commonly used for social media such as Instagram posts and stories, or web-based graphics like banner ads. However, it can be used for pretty much anything. Canva is actually a pretty good tool for non-designers such as small business owners, who just want to create a simple business card or flyer. I have two tips for this.
- start creating your design at the correct size
If using the free tier of Canva you cannot change the size after you start making your file.
- export it correctly!
To use your file for print, you should tick the box for crop marks and bleed, and select PDF Print in the file type drop down menu.
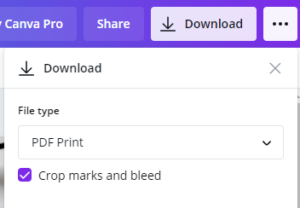
Exporting a file from Canva for print.
Just saving it as an image will give you something suitable for website banners and Facebook posts, but isn’t suitable for print. Read more about Canva files here.
In any case, document size is to be the same size as trim size of job. That’s before bleed. If your flyer is A4, your document size should be 210 x 297mm. Bleed then adds 3mm to each side.
NOTE: You do not need to impose your files for print, and booklet files should be supplied as single pages (not spreads).
If using any of the Adobe products their docs are very helpful for any problems that you might run into.
WHAT DO I NEED TO LOOK OUT FOR?
Regardless of what program you use, there’s a few small things that make a big difference, that you should check off when you start creating your file.
Resolution
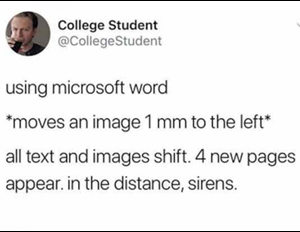
The highest quality print cannot make up for a low resolution file. The best resolution for print is 300dpi or higher. Your average meme on the other hand, is probably only about 72dpi. This looks totally fine on your screen, but will not look good when printed. Also worth noting that a file can be compressed, which lowers the resolution to make the file smaller, but this cannot be undone. A low-resolution file cannot be made high-resolution. Once a piece of paper is crumpled, the creases remain…
Colour
On your computer screen (or phone, or tablet, or any other screen) the colours you see are created with red, green, and blue light. This is what is known as RGB. However, modern technology has so far not been able to recreate this for print – that is, we cannot print with light. We print with ink! To make a full colour image, such as a photo, this would be printed in four colour process – that’s Cyan, Magenta, Yellow, and Black (also known as Key). This means there is a wider range of colours available in RGB that actually cannot be recreated in CMYK. When creating a file for print, start in CMYK.
This is worth noting, because while you can create your file in RGB, when you get your printed product there’s a high chance the colour will look very different. This is because your printer has to convert the colour to CMYK. So it’s best to start with CMYK.
There is also the Pantone Matching System – these are known as spot colours or PMS colours. Pantone is a company that created a standardised set of colours made up of standard ink colours and the recipes to create thousands more. Read more about colour matching for print.
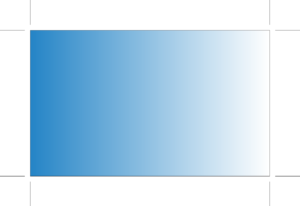
Bleed and trim marks
Bleed is a safe-guard against white edges appearing on your printed piece. Your background colours or images are extended, usually about 3mm or more, beyond the trim area – where your flyer, business card, or other item will be trimmed. The trim marks indicate exactly where the item should be trimmed.
MARGIN
Margin is the safe zone to keep your content in, away from the trim edge. It’s usually 5-10mm. This applies to logos, headings, text, and any content that you don’t want to get trimmed off. It’s also nice to give your elements a little breathing room.
HOW CAN I SEND MY FILE?
- Email – up to 15mb
- On a USB
- FTP
- Dropbox
- Online file transfer such as WeTransfer
- Well-trained carrier pigeon (no)
How to supply artwork for print checklist:
- Resolution: 300dpi (or higher)
- Colour: CMYK or PMS only (never RGB)
- Bleed: at least 3mm
- Margin: at least 5mm
- Text and logos/icons are vector
- Special finishes (diecut, foil, emboss, spot UV, etc) are on a separate layer, using a spot colour, or as a separate file in 100% black.
Need more help on how to supply artwork for print?
I hope this article provided some insight on how to supply artwork for print! If you still need help, our experienced team can assist with your file set up needs. Call (03) 9544 9055 or drop us a line at sales@mjprinting.com.au and we can help!